Adding projects to your website keeps your site active and improves your visibility on Google. (It pairs well with the other habit we set every client up with: collecting Google reviews.) Every new project you upload adds fresh content that search engines love, and it shows real examples of your work to potential customers. By adding photos, descriptions, and locations of completed jobs, Google can better understand what services you offer and where you work.
Video Walkthrough
Adding a Project
1. Access Your Project Submission Page
Open the project submission page using the unique link provided to you.
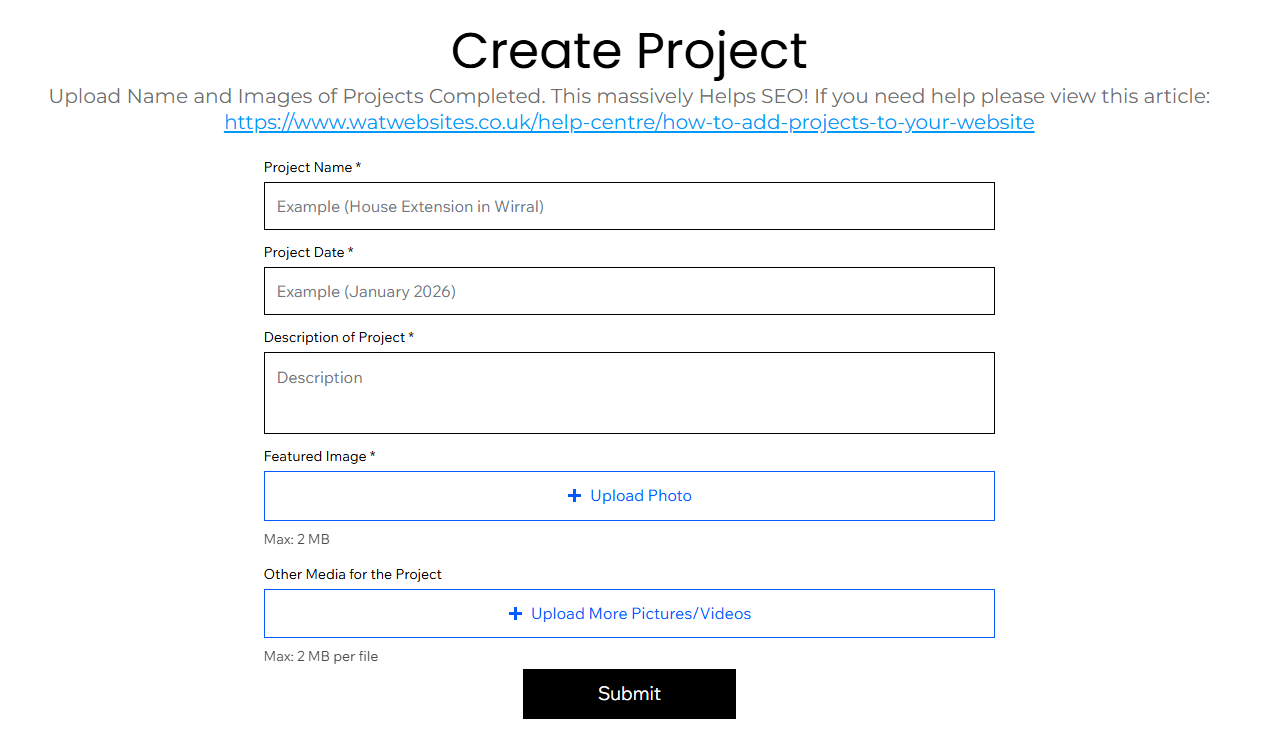
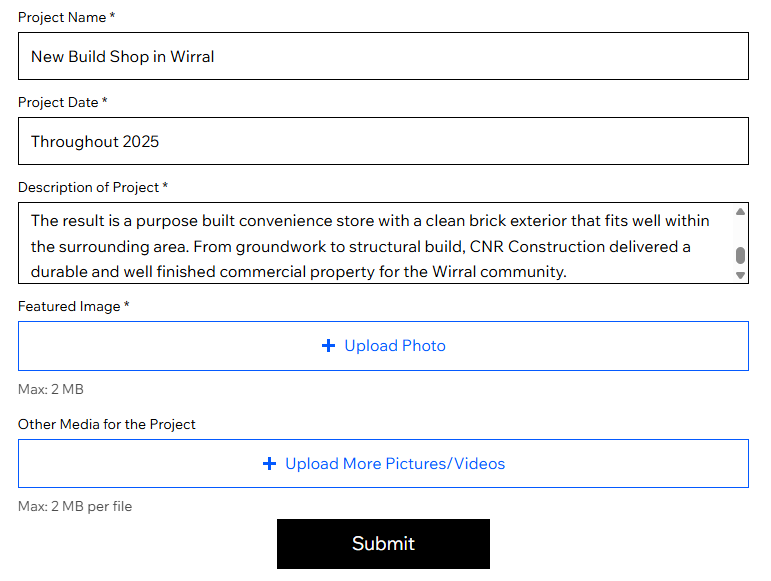
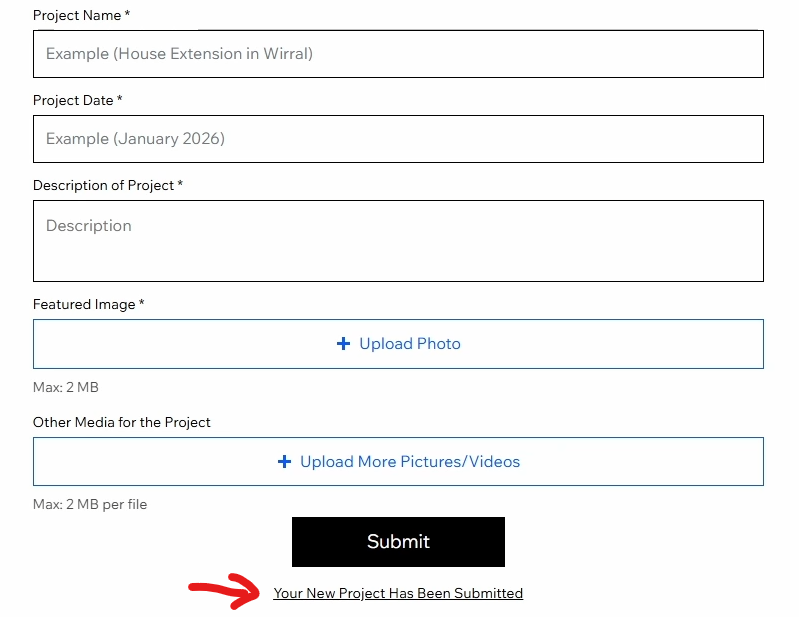
2. Project Name
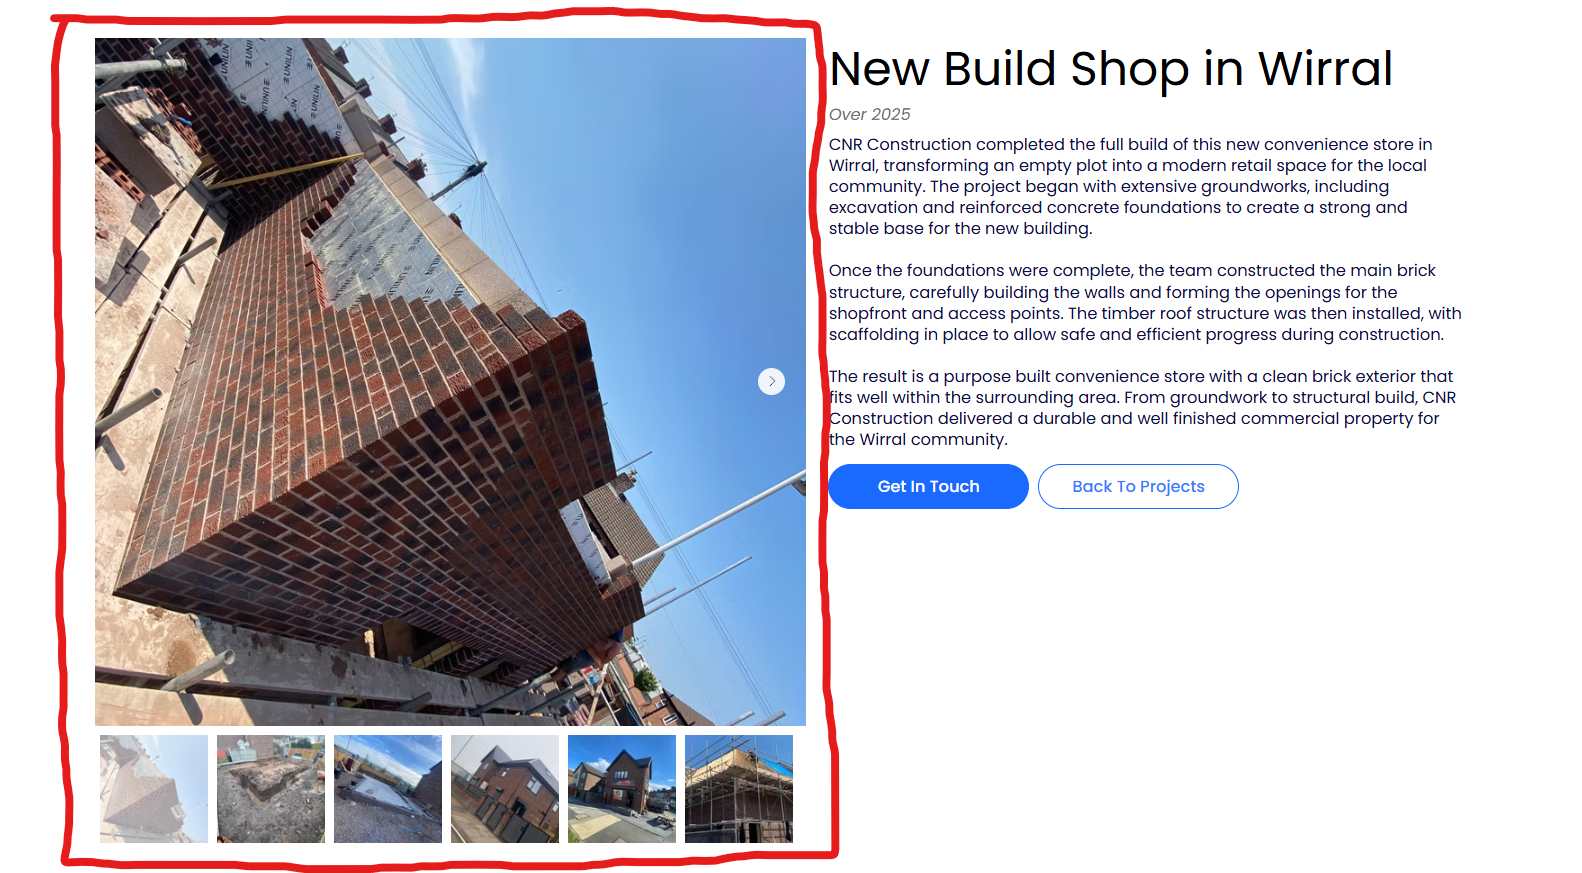
Add a title that clearly describes the work and includes the location if possible. For example, "House Extension in Bebington" or "Garden Patio Installation in Nottingham". This helps both visitors and search engines understand what the project is about.
3. Project Date
Enter the date of the project. This is a text field, so you can write it in a natural format such as "January 2025" or "Completed in 2026".
4. Project Description
Write a description explaining what work was carried out, any challenges involved, and the final result. A few detailed sentences work best; this gives visitors context and helps with SEO.
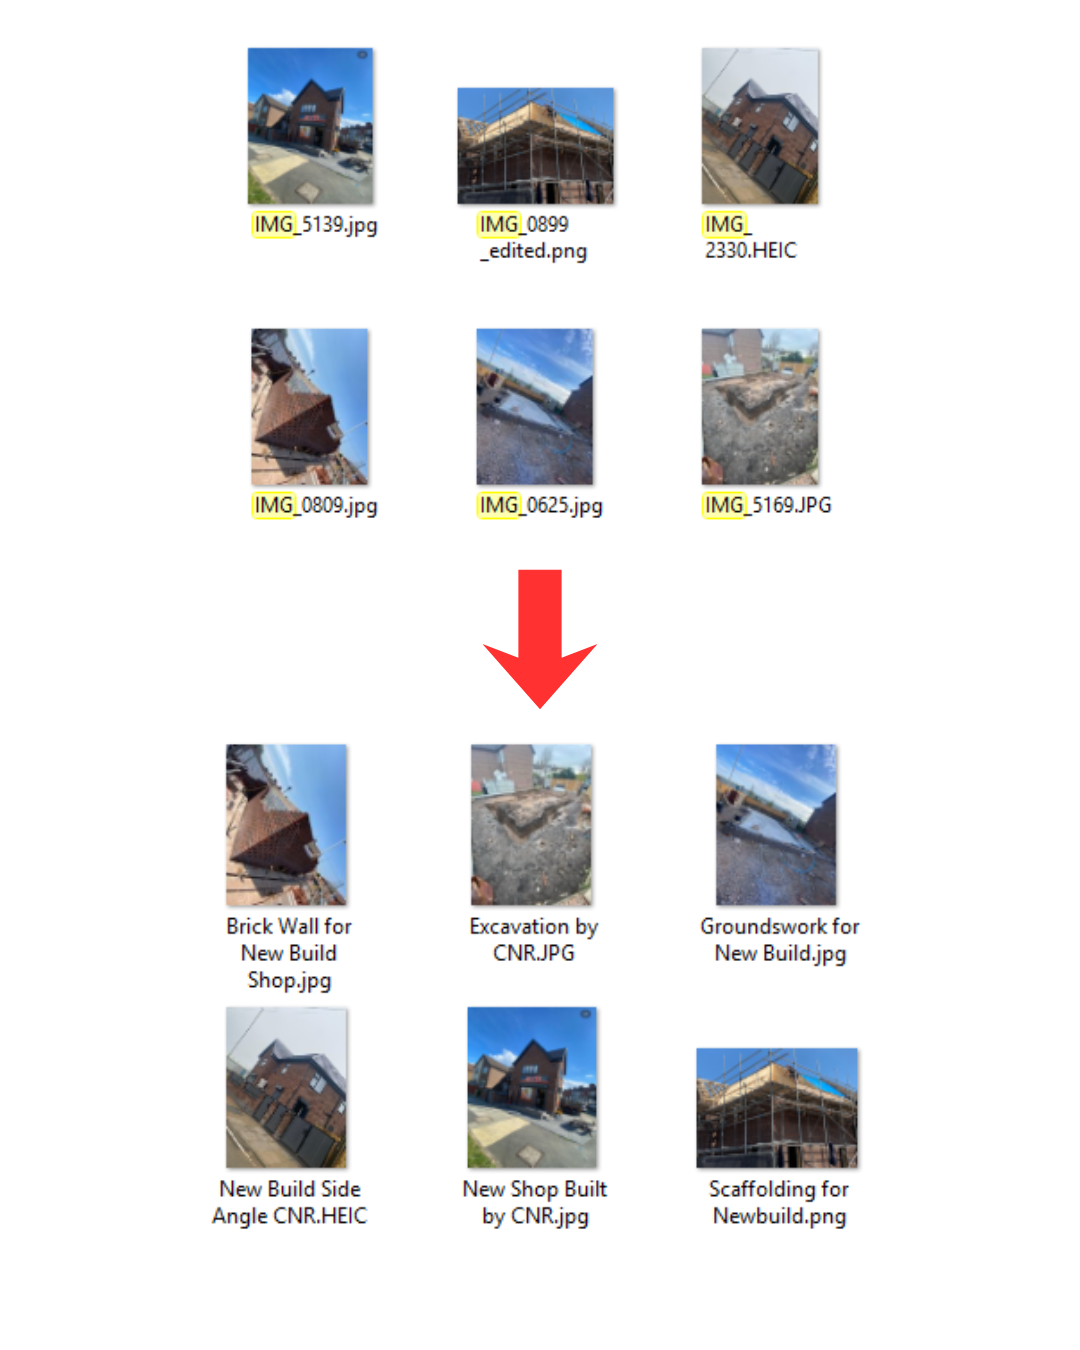
5. Renaming Files (Optional but Recommended)
Before uploading, rename your image files so they describe the work being shown. Instead of "IMG_4821", use something like "house-extension-wirral" or "new-patio-nottingham". This helps search engines understand the images and can improve your visibility in search results.
To rename a file, right-click it in File Explorer and select Rename at the top, then type the new name.
6. Feature Image
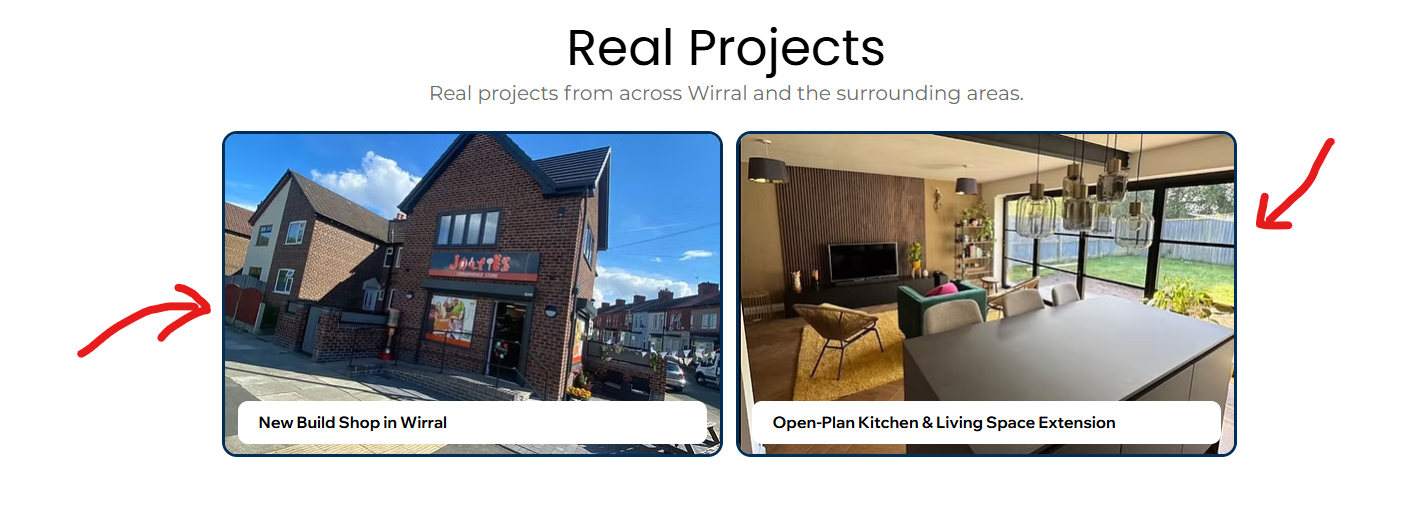
Upload the main image that represents the project. This will appear in the project listings, so choose a clear photo that best showcases the finished work.
7. Other Media Uploads
Upload the image gallery. This should include multiple photos such as before, during, and after shots. The feature image should also be uploaded again here, as it does not automatically copy across.
8. Submit
Double-check all the information you've entered and click Submit. You should see a confirmation prompt at the bottom saying "Your New Project Has Been Submitted" and the form will clear so you can add another one.
Keep in mind it can sometimes take 1–2 minutes to upload, so do not refresh or exit the page while it is processing.
Tips for Maximum SEO Impact
- Include the location in the project title every time
- Add at least 3 photos per project, as Google rewards fresh image content
- Write 2–3 sentences of description minimum
- Aim to add at least 2 new projects per month
The more you add, the more Google sees your site as active and locally relevant.
Frequently Asked Questions
How long does it take for a new project to appear on Google?
The project page goes live on your website within a couple of minutes of submitting. Google then has to index it, which usually takes anywhere from a few days to a few weeks. You don't need to do anything to trigger this; it happens automatically as Google recrawls your site.
What if I made a mistake on a project I've already submitted?
You can't edit a submitted project through the form itself. Just message us with the project name and what needs changing, and we'll sort it, usually the same day. Don't resubmit the whole project, as that creates a duplicate page.
Do I need the customer's permission to post photos of their property?
You're generally fine photographing your own work, but it's good practice to ask, and most customers are happy to say yes. Avoid showing house numbers, street names, or people's faces in the shots. A quick message asking if you can share a couple of photos of the finished job usually does it.
Is it worth adding old projects from months or years ago?
Absolutely. A backlog of completed jobs is free content sitting in your camera roll. Add them with their real dates and locations, and each one becomes another page Google can rank. Just spread them out over a few weeks rather than uploading 20 in one day, so your site shows steady activity.
My photos won't upload or the page is stuck processing. What should I do?
Large photo files are the usual culprit, especially videos or 20+ images at once. Give it the full 1–2 minutes before assuming it's stuck, and stay on the page. If it still fails, try fewer images per submission or a stronger internet connection, and if nothing works, send us the photos and we'll upload them for you.


